
 (320 x 40 px) (6000 x 750 px) (3)")
 (320 x 40 px) (6000 x 750 px) (3)")
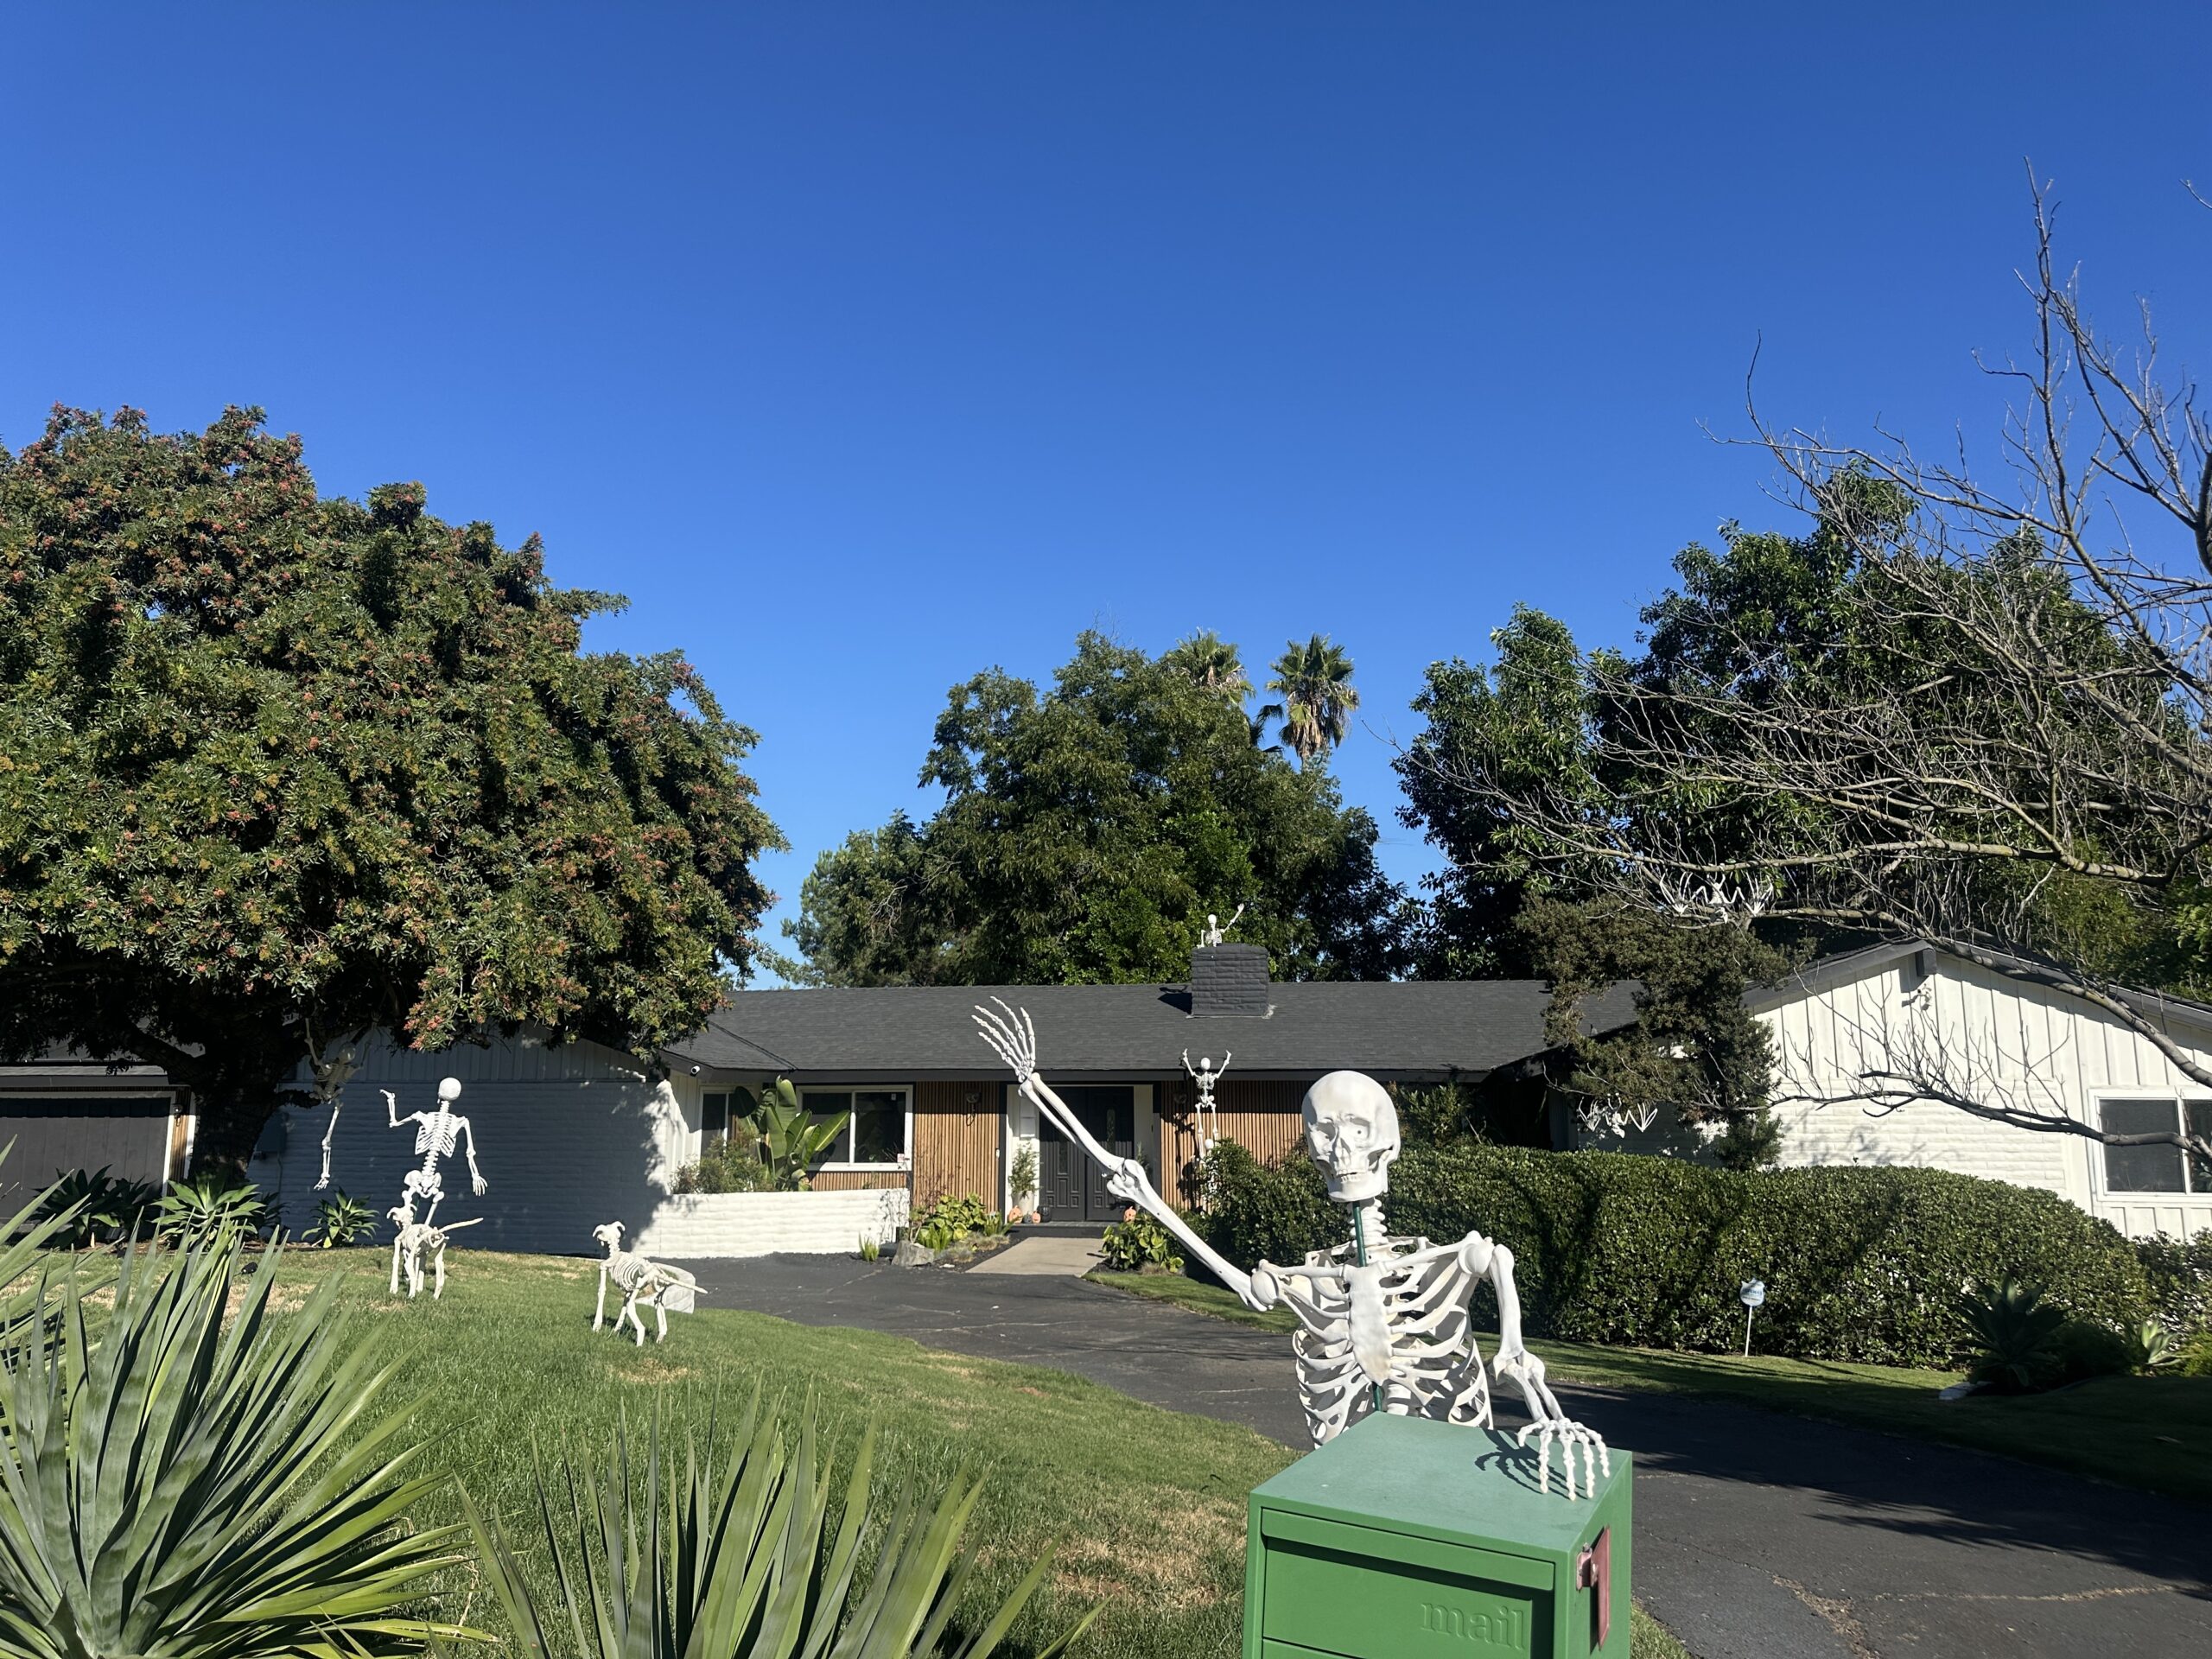


Nothing says “welcome to spooky season” quite like a front yard full of skeletons. It’s festive, fun, and guaranteed to make neighbors smile (or jump a little). This year I went all in with six human skeletons, two dog skeletons, and three bat skeletons—and let me tell you, it’s become the highlight of the block. But it took me a few tries to learn how to pose the skeletons in my yard.
If you’ve ever wanted to create your own bone-chilling (but family-friendly) display, here’s exactly how I staged mine, plus some tips to make yours look both professional and playful.
What You’ll Need
- 5ft Human Skeletons(the more the merrier!): $29
- Or save with the 6 pack: $129
- Dog Skeletons: $59
- 23″ Bat Skeletons: $18
- 5ft Stakes: $4.97
- Smaller Stakes for Dogs: $1.87
- D Ring Picture hanger for climbing skeleton:$3.97
- Rope for skeleton around chimney: $6.74
- Large Clear Zip Ties: $4.20
- Outdoor Spotlights (can change colors): $79
- Outdoor timer for lights: $24.99 I use this for Christmas too, to auto turn on and off.
- Optional White Spray Paint: $6.87
Tools you might need:
Optional add-ons: costumes, props (think mail, lanterns, or pumpkins), fake cobwebs.
Step 1: Choose Your Skeleton Cast
For my scene, I used:
- 6 humans
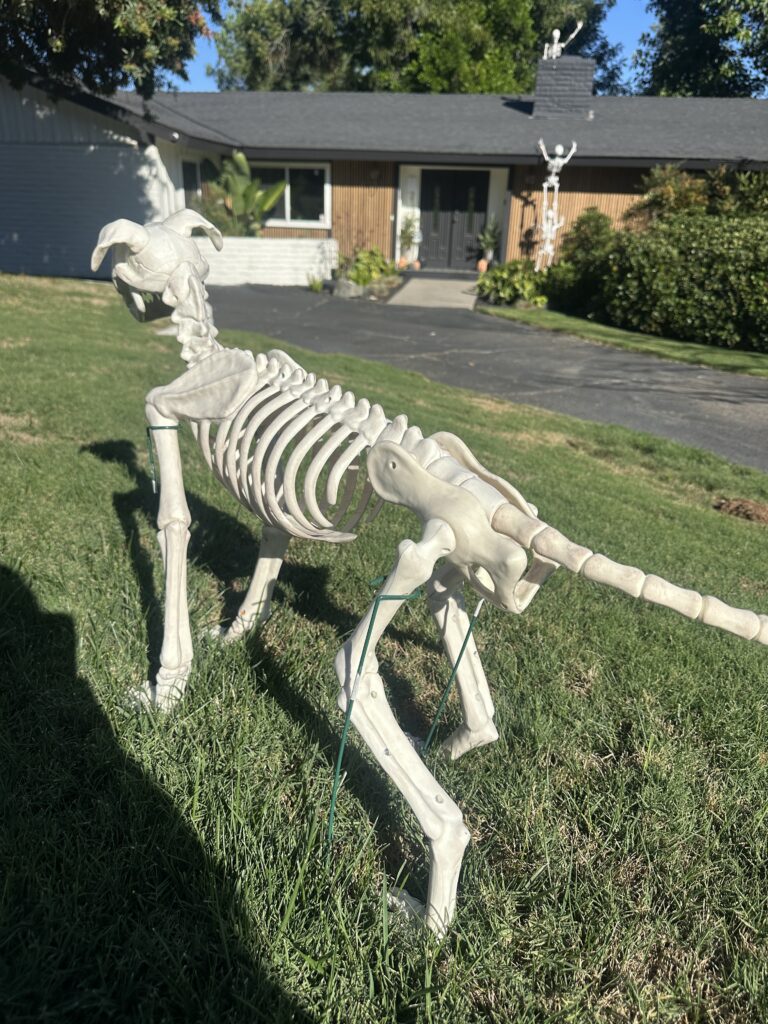
- 2 dogs
- 3 bats
Before I show you how to pose skeletons in your yard, you have to select your cast! Having a variety makes the display more dynamic—like they’re all part of one big skeleton story. Here are some of my other favorites that I have seen! Target has a great selection of animal skeletons.
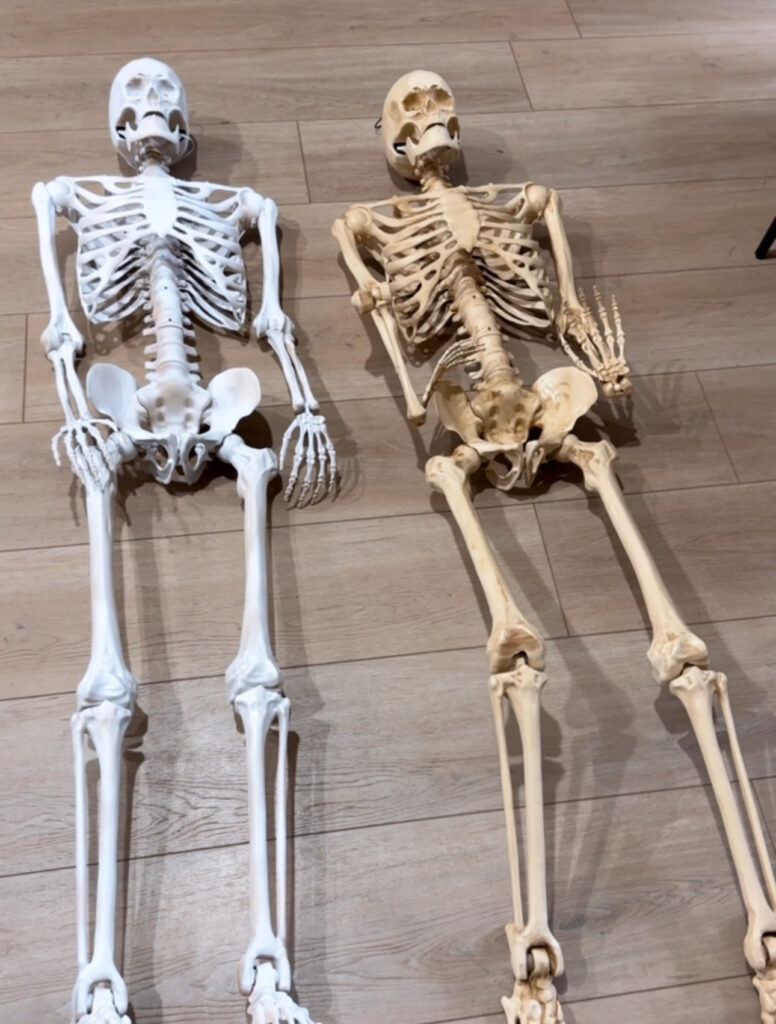
👉 Small tip from me: I actually spray-painted my human skeletons more white. The ones I bought came a little too yellow for my taste, and this silly little preference made them pop so much more in the yard. If you’re picky about color like me, a quick coat of white spray paint gives them a crisp, clean look that glows under the spotlights. I didn’t do it perfectly to give it that aged look.
You can see the before and after of mine in the picture. Spraying them whiter also matched the dog and bat skeletons that were already whiter in color.
Step 2: Create Character Moments
The magic is in the posing! Instead of just scattering skeletons around the yard, give them little “roles” in a story.
Here’s how I staged mine:
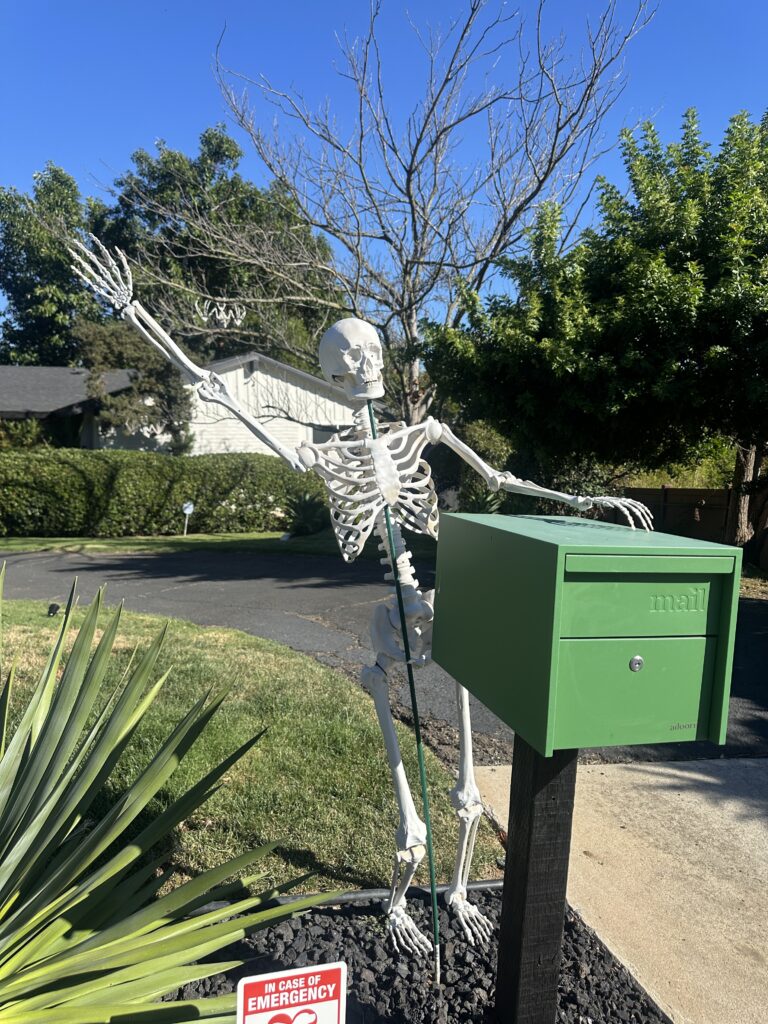
- Mailbox Greeter: One skeleton leans on the mailbox, waving hi to every passerby. It’s equal parts creepy and charming.
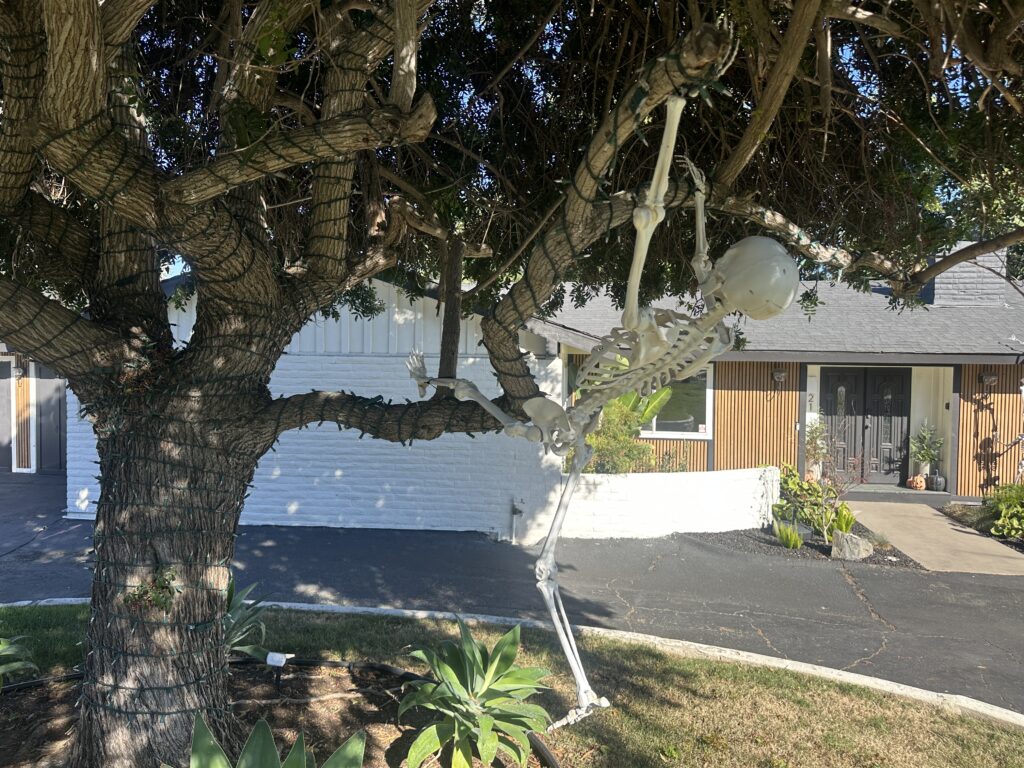
- The Chase: My two dog skeletons are mid-sprint, “chasing” another skeleton across the yard. Ahead of the pack, that skeleton is jumping for dear life, hanging from a tree branch with zip ties.
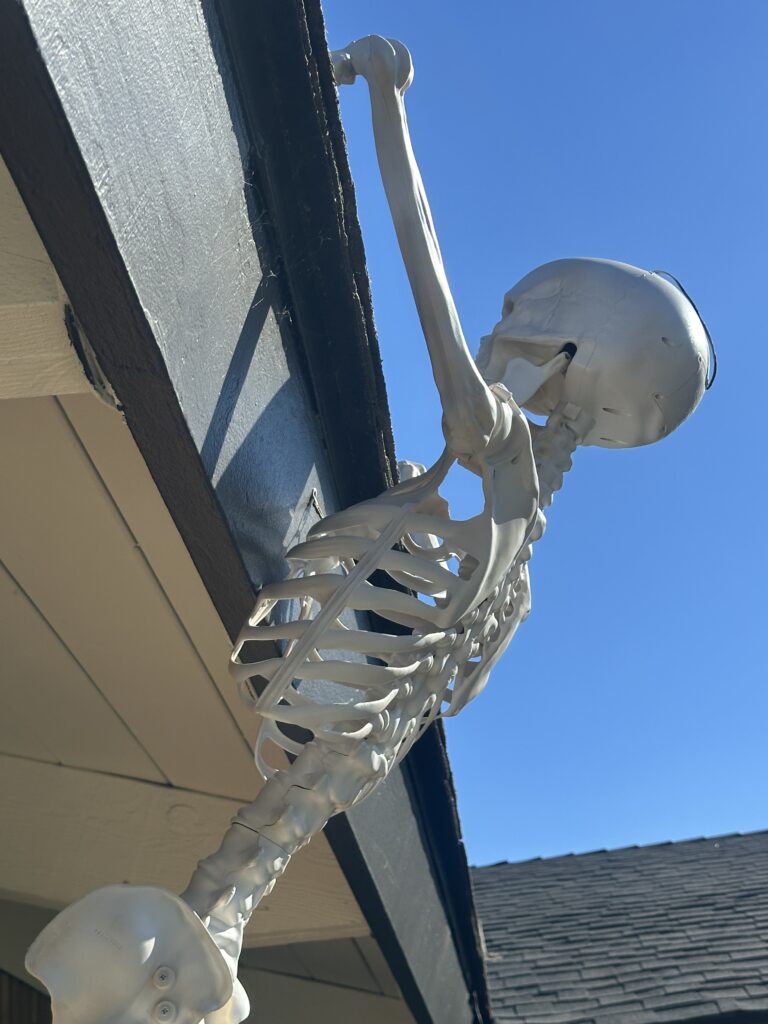
- Roof Climbers: Two brave skeletons are stacked—one standing on the other’s shoulders—trying to climb onto the roof.
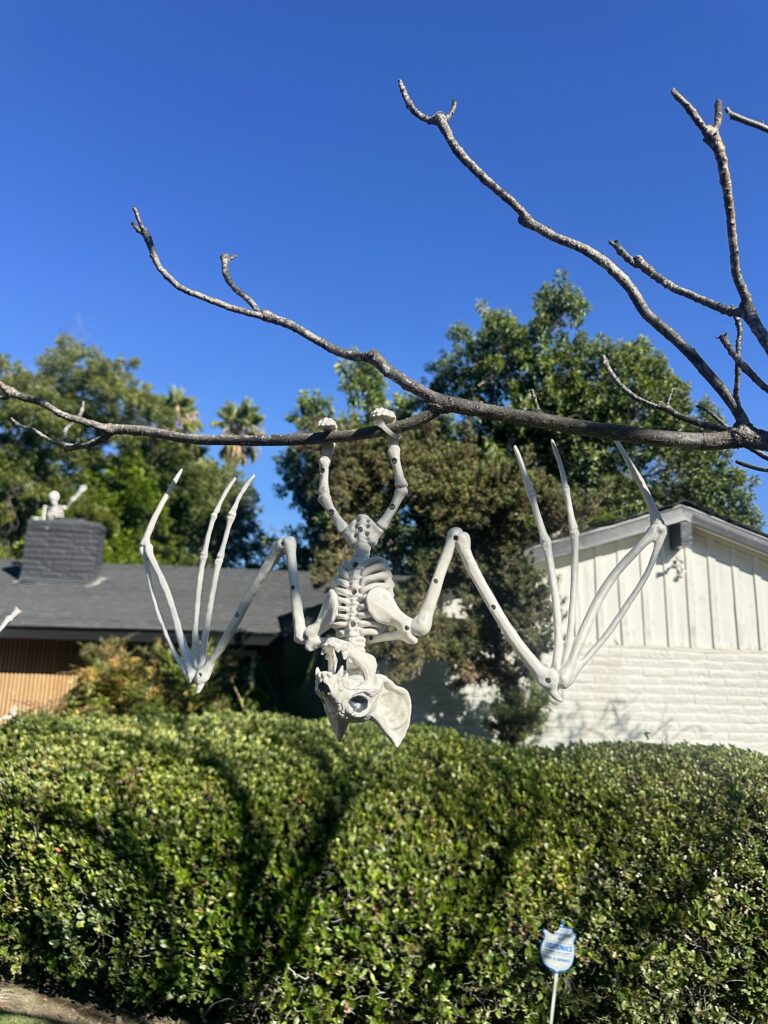
- Bat Brigade: Three bat skeletons dangle upside down from a leafless tree, making the whole scene feel alive (or undead).
10 Other Fun Ideas to Pose Your Skeletons:
- 1. Skeleton BBQ Party: Pose one skeleton flipping burgers at the grill, another holding a spatula or hot dog, and a third “guest” lounging in a lawn chair with a drink.
- 2. Trick-or-Treat Squad: Give a few skeletons candy buckets or pillowcases and line them up on your porch like they’re out trick-or-treating.
- 3. Skeleton Gardener: Set up a skeleton pushing a wheelbarrow, raking leaves, or holding a watering can over a pot of “dead” plants (bonus points for black flowers or wilted mums).
- 4. The Sports Fans: Two skeletons tossing a football across the yard, or one mid-kick with another holding a goal post stance. Perfect if you’ve got lawn space.
- 5. Campfire Scene: Circle a few skeletons around a fire pit (real or fake), with marshmallow sticks in hand. Add a cauldron for a witchy twist.
- 6. Graveyard Escape: Have skeletons crawling out of fake tombstones or from beneath the ground, with dirt piled around their arms and skulls.
- 7. Skeleton Yoga Class: Pose three or four skeletons in funny yoga positions—downward dog, tree pose, or warrior pose. Bonus: it’s hilarious at night with spotlights.
- 8. The Band:Give skeletons instruments (real or DIY cardboard/garden tool substitutes) and arrange them as a rock band on your lawn or porch. Add a spotlight for a “concert” feel.
- 9. Porch Swing Couple: Seat two skeletons side by side on a porch swing or bench, holding hands, maybe one with an arm around the other. Cute + creepy!
- 10. Mail Thief: Have one skeleton sneaking up to your mailbox with a bag over its shoulder, while another (like your mailbox greeter!) “catches” them in the act.
Step 3: Secure the Setup – How to Pose Skeletons in Your Yard
Securing the skellys was a little tricky to get right! But I think I mastered how to pose skeletons in the yard this second year!
Pro tips:
- For the stakes I use a rubber mallet to hammer into the ground. If the ground is hard, I used a drill to drill a hole slightly skinnier than the stake first.
- For the zip ties: Use clear so you can’t see them.
- For extra stability you can also use (2) 3ft stakes for the legs.
Here is how I anchored all of mine:
- Roof climber: I have a picture hanger that is screwed into the fascia of the house. (It is small, I just leave it up year round) Then I used a zip tied looped through the picture hanger loop and the skelletons chest.
- Roof climber helper: I used a 4ft garden stake, and I put the skeleton over it through the chest and the inside of the skull rests on the top of the stake. You can also zip tie.
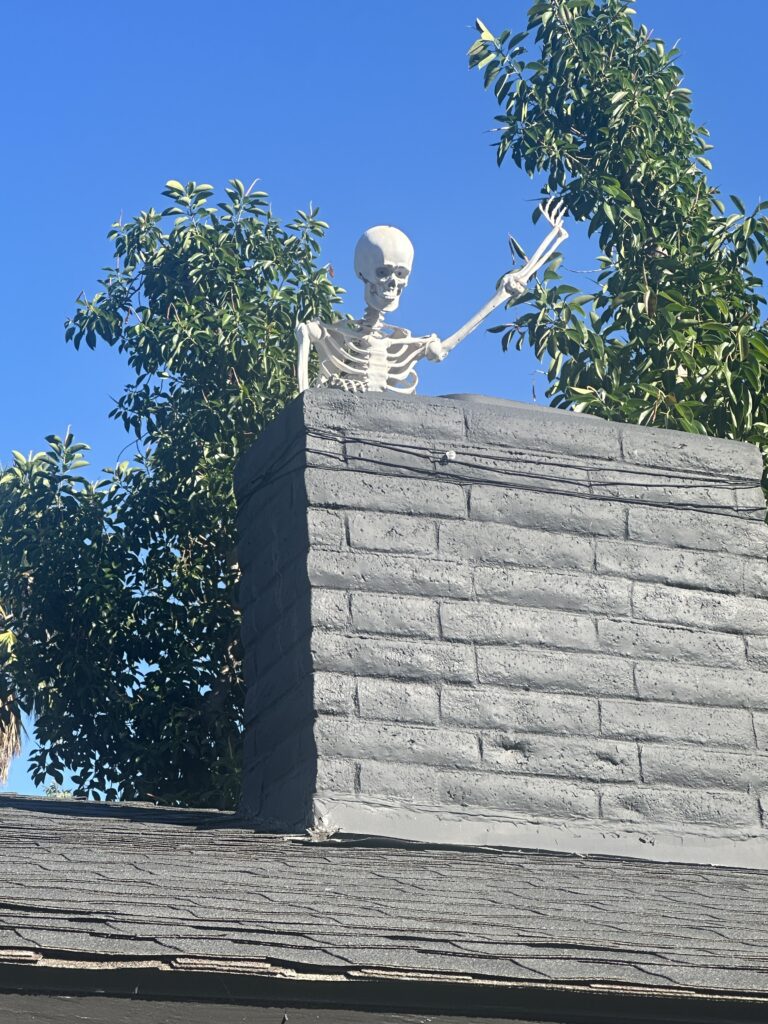
- Chimney sweeper: For the skeleton around the chimney we didn’t want to drill or anything so we just used black rope and tied him to the chimney.
- Tree climber: I used 3 zip ties to hold each hand and one foot to the branches. The second foot dangling down really makes him easy to spot, and makes it look like he’s still in action!
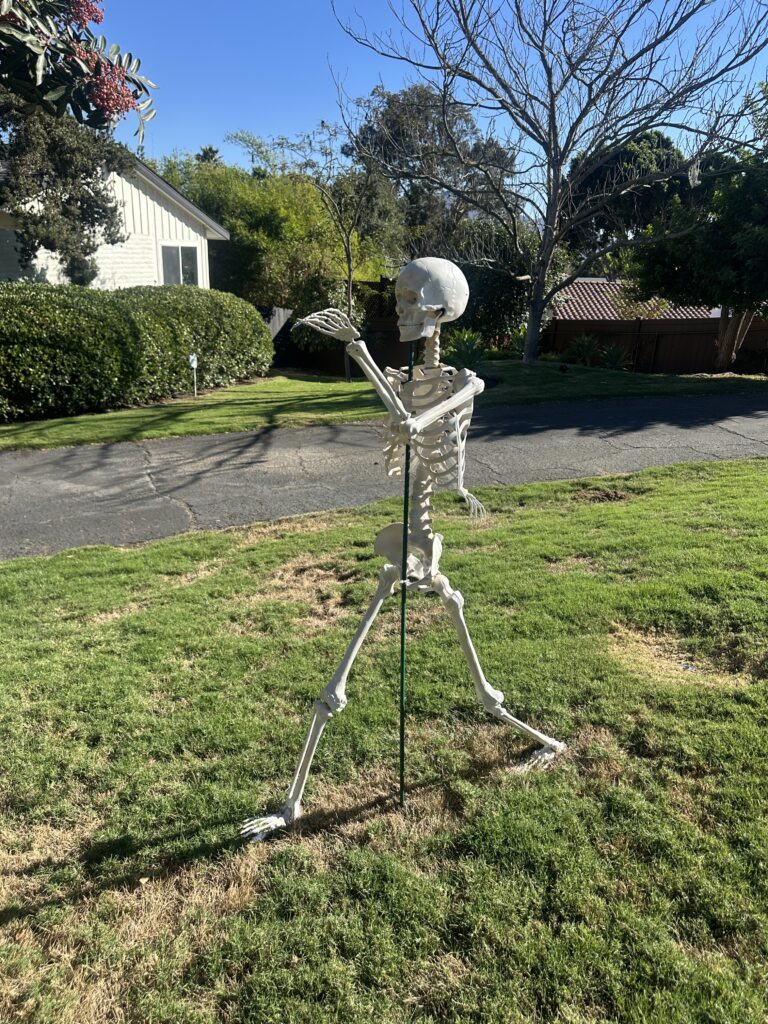
- Runner: I used a 4ft garden stake, and I put the skeleton over it through the chest and the inside of the skull rests on the top of the stake. I also zip ties his pelvis to the stake. Pose him to look like he is running!
- Doggies: I used 3 Small stakes around 3 legs, and pushed those into the grass.
- Mail man: I used a 4ft garden stake, and I put the skeleton over it through the chest and the inside of the skull rests on the top of the stake. I also zip ties his pelvis to the stake.
- Bats: I wanted them to hang upside down by their feet. The feet are actually curved and fit over a branch well. I zip tied one foot to the branch.
*Zoom in on the pictures to see attachments better

Step 4: Add Spooky Lighting
Lighting is what transforms your daytime setup into a nighttime showstopper. I use purple spotlights on a timer that hit each “scene” around the yard. The glow makes the skeletons pop against the dark and adds instant drama.
I also like these solar spotlights that can change colors: https://bit.ly/48WdYwU
Step 5: Extra Ideas (If It Fits Your Vibe)
Some people like to dress their skeletons in costumes (pirates, wedding outfits, even football jerseys). It’s hilarious, but not my personal vibe—I prefer the clean, classic “bare bones” look. You can also:
- Place skeletons on porch furniture.
- Give them props like pumpkins, brooms, or lanterns.
- Scatter fake tombstones or cobwebs to complete the scene.
Final Look
The best part? This whole display is easy to set up, easy to pack away, and totally customizable every year. Skeletons are like Lego pieces, you can reimagine the scene a hundred different ways.
Every time I pull into the driveway and see the mailbox greeter waving, or the dogs chasing their prey, I can’t help but smile. And at night, the purple lights make it feel like a full-on Halloween attraction.
So grab some skeletons, a few stakes and zip ties, and get creative. Trust me: your yard will be the talk of the neighborhood! I got SO many complements last year!
I want to see how you pose your skeletons in your yard! Tag me @designs.byerica

 (320 x 40 px) (6000 x 750 px) (3)")
")
+ show Comments
- Hide Comments
add a comment