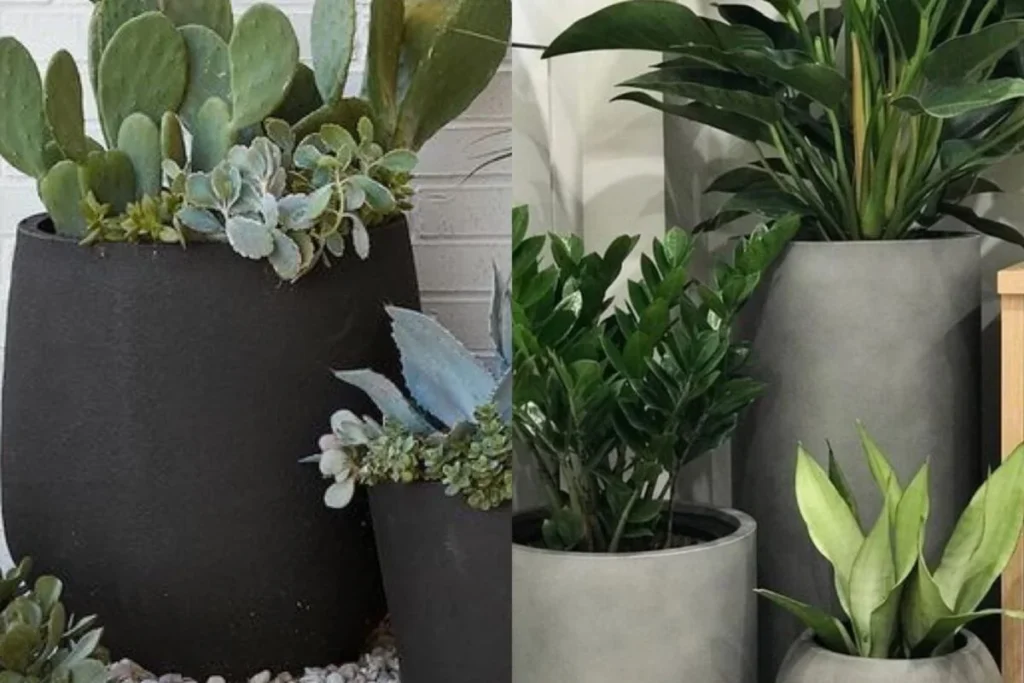
^^ These are my $200 each inspo pots! I like both colors and will probably end up doing some in both colors!
Y’all I have a major plant addition, and planter crush… only problem is that EACH planter is about $200… nope.
So, like any good DIY project starts out, I was on the hunt to find a way to create my own.
The simplest solution would be to find a planter that was the right shape and size, but just needed to be spray painted. I listed a few of my favorites here:
My biggest thing is that I do not like planters that have a lip around the top. which is very hard to find for some reason…
But when I was at Home Depot, I stumbled across a REALLY cool shaped one that was the perfect size for only $22!! BUT it had ridges in it… But since I had just done a wallpaper project using joint compound to smooth out our textured walls, it got my wheels spinning…
Can I just use joint compound to smooth this out? The answer was YES!
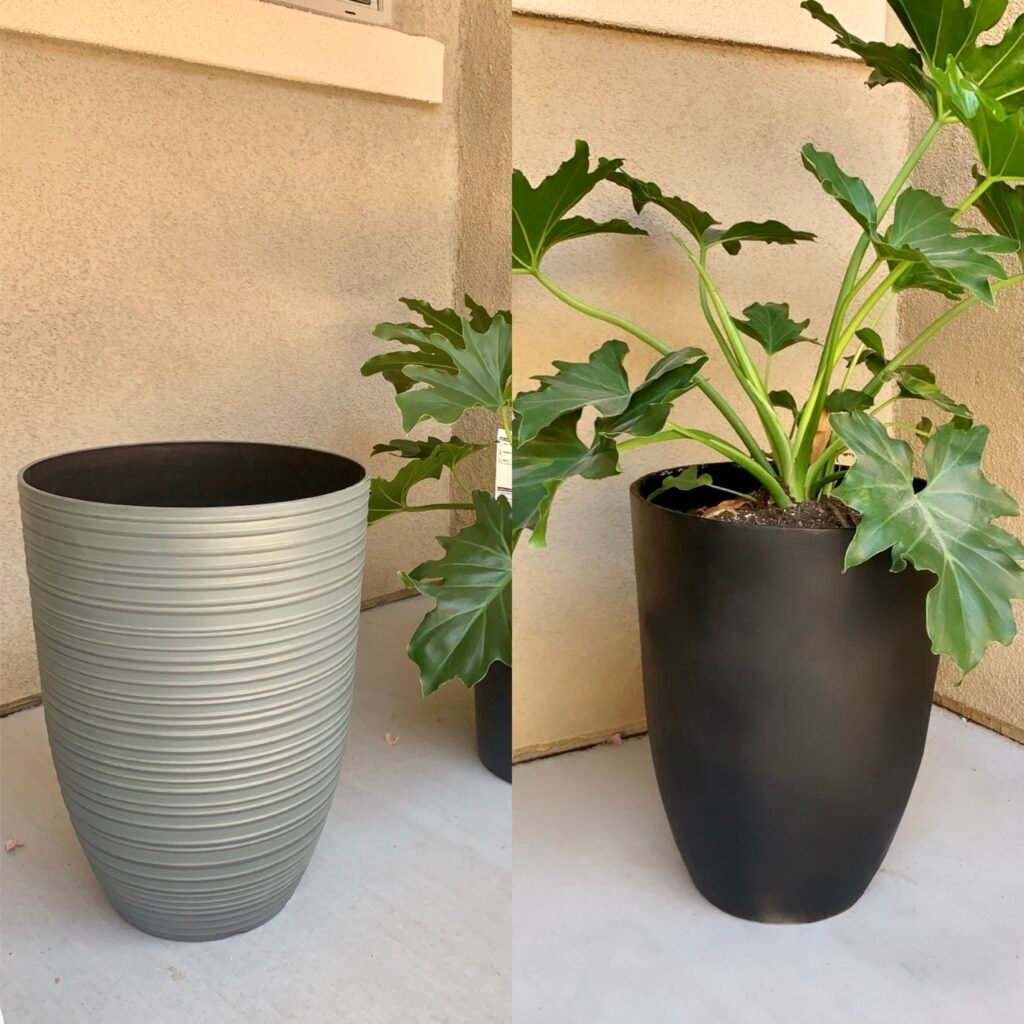
With a little trial and error, here is my planter before and after, and now I am going to teach you how to recreate it!

What You’ll Need:
I linked everything to Home Depot so you can 1 Stop Shop. They have FREE same day store pickup, which I love because I can’t ever seem to find things at the store and that way you know it is all in stock too!
OR, click these links and you can figure out which aisle and bay the item is at in your store! Learn more about this in my article “How to shop at Home Depot”
- Cabana 13.5 in. W x 18 in. H Resin Tall Bullet Planter $29.97 – This is the exact planter I used.
- All-Purpose Pre-Mixed Joint Compound $5.98 – this is what fills in the cracks and gives it the concrete look.
- Plastic Taping Knife Set $2.96 – This is what you uses to apply and smooth in the joint compound.
- Sanding Sponge Coarse Grit 2 pack $7.97 – this is to sand down the application for desired look.
- Rust-Oleum Self Etching Primer $5.28 – This helps the paint stick better.
- Rust-Oleum All Surface Satin Paint & Primer in One $5.98 (I used the color Black, linked here) – this is the color that you will be transforming your pot to)
- Rust-Oleum Surface Dead Flat Clear Topcoat Spray Paint $7.98 – to protect the paint from scratches and dings.
The plant we went with is called a Philodendron $19.98 – These are beautiful plants and easy to keep alive 🙌
Step 1: Apply the first layer of joint compound
(Skip this step if you don’t need to fill anything in)
Because my lines were running horizontal, I applied the joint compund horizontal also so that it would be smooth and fill in correctly.
For this coat make sure to get into all of the creases and and to smooth any lumps out – otherwise it’s a lot more sanding work later.

Allow it to dry to the touch (about an hour)
Step 2: Second Coat (if needed)
Because the grooves were so deep on mine, I really needed a second coat to to create an even surface. The first coat was really only to fill in the cracks.
Prior to applying the second coat, you may want to sand down anything that is bumpy or not smooth (it helps this coat go on smoother)
Follow the same steps as before.
Step 3: Sand Down
This is the step that is going to get you the really smooth look!
I sanded mine down quite a bit, but I was also really quite messy with my joint compound application.
Mine still had a few spots that were texturized, but I liked that look to make it look like more authentic concrete with the small imperfections. So, this is where your personal preference really kicks in.
Make sure to wipe down any excess dust.
Step 4: Self Etching Primer
As you’ll feel, the smooth joint compound isn’t super sticky, so we want to apply the self etching primer to allow the spray paint to stick to something.
Spray a super fine coat on the entire pot.
Allow 2 hours to dry.
Step 5: Spray Paint
You will want to spray 2 coats of whatever desired colored spray paint that you are using. Follow the spray paint directions.
For a grey concrete look, spray it more splotchy to give it a few blemishes like the grey inspo image.
- Shake the can well often
- Do a test spray in the air to make sure it is spraying properly and not chunky
- Spray about 8-12 inches away
- Spray 2 coats
- Wait 2 hours before spraying the next coat (This spray seemed to need more time to dry)
Step 6: Matte Clear Coat
This is the final step, and is used as a protection against chips or scratches.
- Shake the can well often
- Do a test spray in the air to make sure it is spraying properly and not chunky
- Spray about 8-12 inches away
- Spray 2 coats
- Wait 5 mins before spraying the next coat
It is dry to the touch within 30 minutes. However, I opted to wait 24 hours before spraying over the color.
Step 7: Plant a beautiful plant inside!
As mentioned in the “what you need” section, we opted for a Philodendron because we liked the look and it is an easy plant to maintain.

+ show Comments
- Hide Comments
add a comment