
 (320 x 40 px) (6000 x 750 px) (3)")
 (320 x 40 px) (6000 x 750 px) (3)")
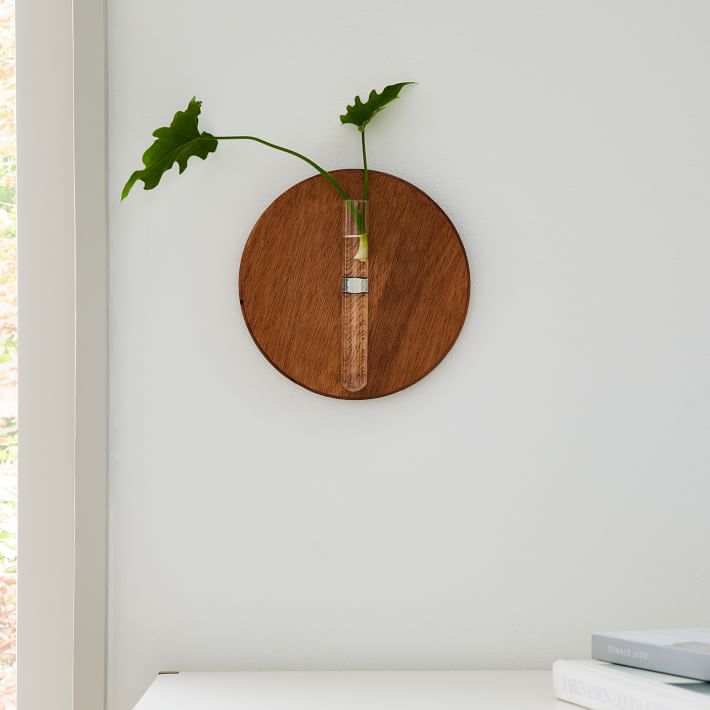


I was so excited when I ordered the West Elm StoneWon Designs Co. Hanging Propagation Station piece of wall decor online for $47, but when it arrived, I was shocked! It was so tiny—only a 6-inch diameter! The picture was super deceiving, and I definitely didn’t do my due diligence to double check size.
I loved the design though and had my heart set on putting two of them on a specific wall in my home. Instead of coming up with a new plan for my wall, I decided to make my own, at a 12-inch diameter, and I ended up saving a ton—less than half the cost!
Let me show you how easy it was to make this Wall Propagation DIY dupe.
Total time: 15 mins
My cost each (I made 2): $19
One of the reasons I saved so much is because I already had most of the materials on hand from a previous DIY project, but I’ll still link what I used so you can recreate it yourself. I only needed to buy the wooden circles, and the propagation tubes!
What you’ll need:
- Wooden Circle: $11.99
- Pre stain conditioner: I had some on hand.
- Stain: I used a mix of 2 stains I had on hand-
- Stain rag or foam brush: I used these rags I had on hand
- Sandpaper: I used some I had left over from another project
- Propagation tubes: 2 for $13.99
- Rubber Band – Skip to step 5 to read why!
Pro Tip: Here’s 3 ways to make shopping at Home Depot easier.
Step-by-Step Guide to Creating Your Wall Mounted Propagation DIY:
Step 1: Sand the boards
Sanding ensures that the finished product looks professional. The main area to focus on is the edges. I actually wish I spent more time on mine because when they are rough, they absorb a lot more stain and get very dark. I ended up planning it out so the “bad” side faced where you couldn’t see it once it was hung. If you have an electric sander, even better! Just keep in mind the shape so you don’t sand it away.
I suggest starting with rougher grit sandpaper, then finishing with a smoother grit.
Step 2: Test your stain
If you have one or multiple stains you want to test to make sure you pick the right color, I suggest doing so on the back of the board so you don’t have to sand it off.
Step 3: Pre Stain Conditioner
Apply a coat of pre-stain conditioner to the top and sides of the board. I checked both sides to see which I liked better. The reason you condition the wood before staining is to ensure the stain applies evenly and to prevent blotching. Allow about 10 minutes to dry before applying the stain.
Step 4: Stain the boards
I prefer to apply stain with a rag because it goes on more evenly and lets me work faster. Apply as many coats as needed to get your desired color. For the rougher sides, I used a foam brush dipped in stain, and then a little in a cup of water to dilute it so it wouldn’t get too dark. I used some exterior stain samples even though this wasn’t an outdoor project, and they worked great! I applied 1 coat of American Chestnut, and 2 coats of Tugboat. Since the stains I used already had a sealer, I didn’t use a top coat, but depending on your stain and the look you want, you may want to use a top coat.
Step 5: Attach the propagation tube
This step was harder than I thought! How in the world do you get the propagation tube in the middle of the board?! Luckily, my husband had a genius idea—this is where you need your rubber band.
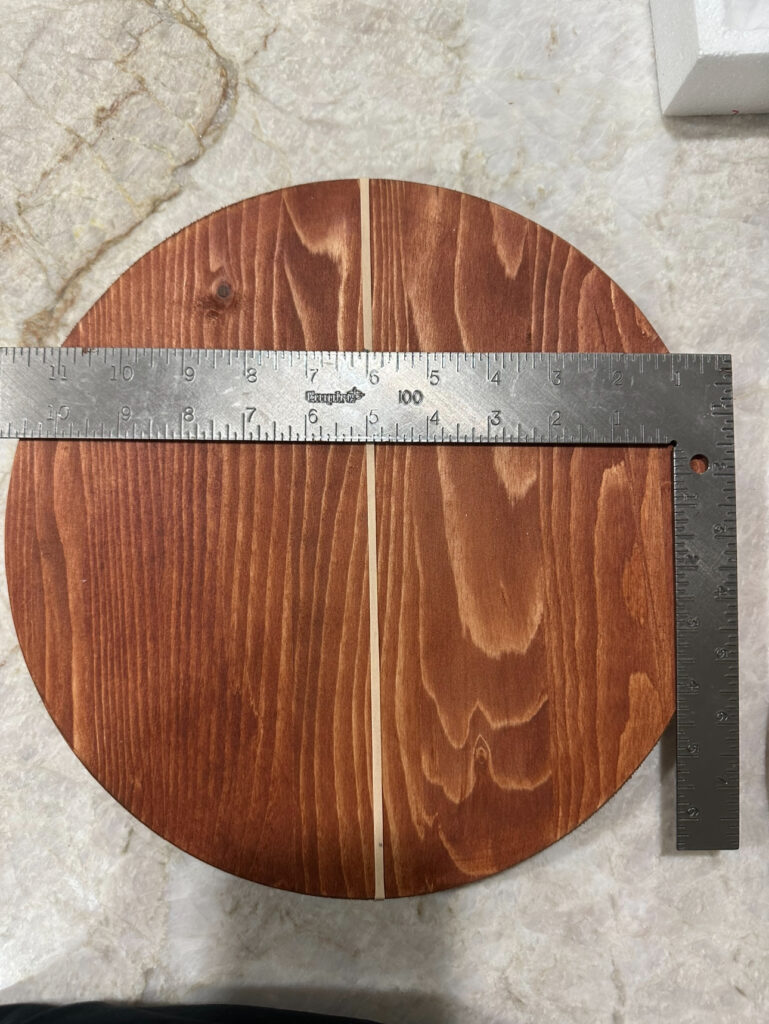
To measure:
- Wrap the rubber band around the board where you think the middle is.
- Using a 12-inch ruler, place the 6-inch mark (middle of the ruler) on the rubber band across the board, and make sure there’s equal space to each edge.
- Adjust as needed.
- Measure a few placements up the board (3-5) to ensure it’s straight.
- Mark where you want the tube mount to go. I wanted about an inch at the bottom of the tube, so I marked the top of the tube mount at 1.25″ inches from the top.
- Place the mount where you want it and hammer the nails in.
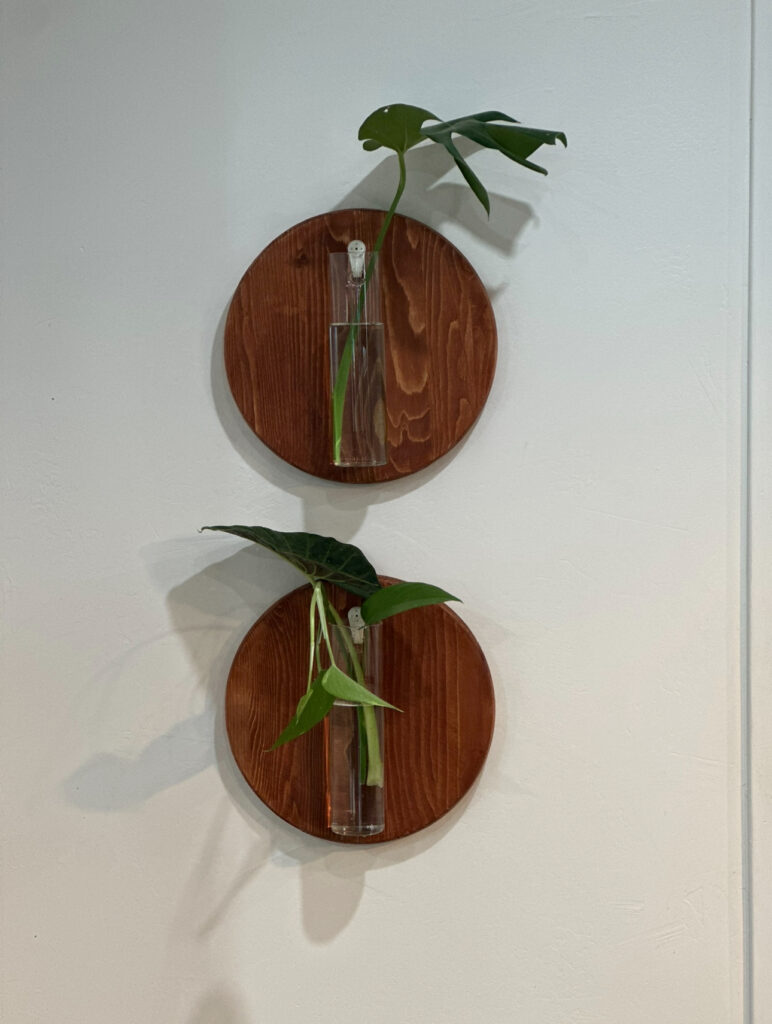
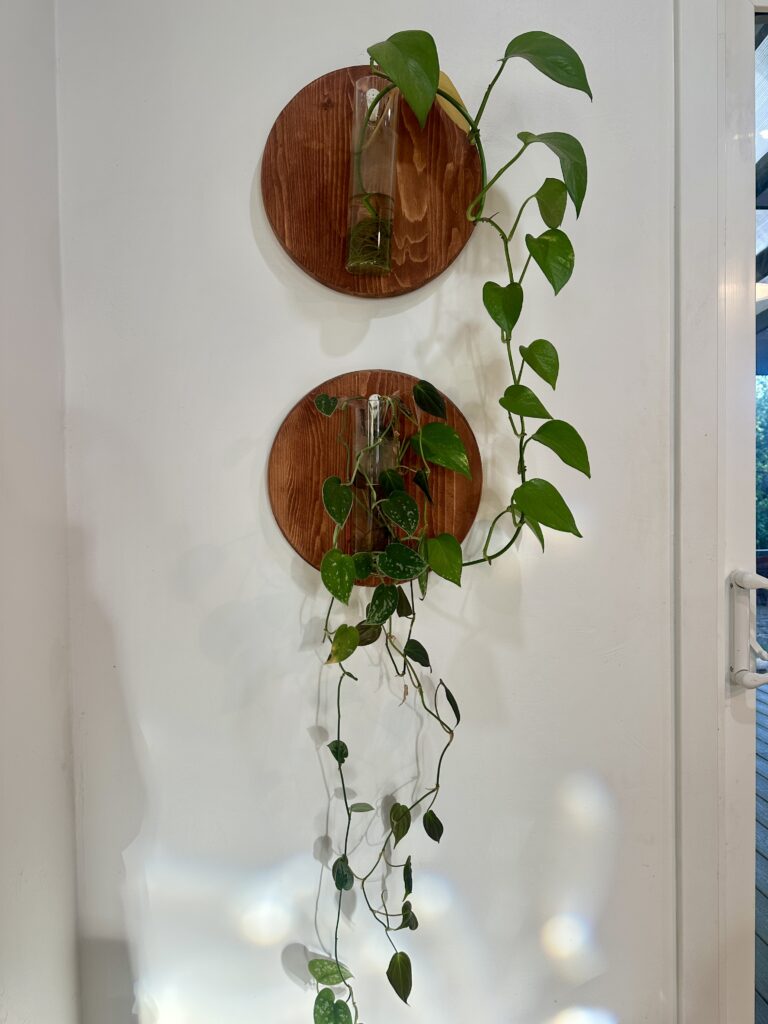
Here they are day 1, and a year later! Things grow great in them. I need to plant these long ones, and get some new shorter ones in 🙂
Why DIY?
Creating your own wall art not only saves you money but also allows you to customize it exactly to your space and style. This DIY oversized wall art project cost me a fraction of the price of store-bought decor and only took 15 minutes! Plus, making it yourself adds a personal touch to your home.
With just a few materials and some simple steps, you can create beautiful, affordable home decor that looks like it came straight from a high-end boutique.

 (320 x 40 px) (6000 x 750 px) (3)")
")
+ show Comments
- Hide Comments
add a comment